On this page
- Installing Openfire 3.3.3 & Spark 2.5.7 On Debian 4.0 Etch
- Step 1: Acquisition Of Openfire& Spark Packages
- Step 2: Decompress The .Tar Of Openfire
- Step 3: Installing The Version 1.5.0 Of Java (JRE-1.5.0)
- Step 4: Installation Of The Database For Openfire
- Language Selection
- Server Settings
- Database Settings
- Profile Settings
- Admin Account
- Summary Of Openfire Server Configuration
Installing Openfire 3.3.3 & Spark 2.5.7 On Debian 4.0 Etch
Dominique Claver KOUAME
[email protected]
This artivle explains how to install and use Openfire and Spark. Openfire (previously known as Wildfire Server) is a Jabber/XMPP server, and Spark is a Jabber/XMPP client; both are written in Java. Spark is an open source, cross-platform instant messaging client optimized for businesses and organizations.
Note: The installation that we describe below has been made on Debian 4.0 (Etch) with the following elements already installed:
- Debian 4.0 (etch), a base just
- MySQL server 5.0
- PHP5
- Apache2
Our environment:
- IP Address of Debian server: 192.168.2.1
- IP address of the laptop Windows XP client: 192.168.2.3, on which we installed spark
- Domain: dpi-arobasetelecom.ci (it is a test domain)
Step 1: Acquisition Of Openfire& Spark Packages
Download the Openfire .tar file from http://www.igniterealtime.org/downloads/index.jsp
Download the Spark .exe file from http://www.igniterealtime.org/downloads/index.jsp
Step 2: Decompress The .Tar Of Openfire
#tar zxvf openfire_3_3_3.tar.gz
#mv openfire /opt
Step 3: Installing The Version 1.5.0 Of Java (JRE-1.5.0)
On Debian Etch the Java version is 1.4; then to do it we must add the non-free repositories and make an update before embarking on the installation of Java:
# vim /etc/apt/sources.list
(Below the content of my sources.list file)
# deb cdrom:[Debian GNU/Linux 4.0 r0 _Etch_ - Official i386 DVD Binary-1 20070407-11:40]/ etch contrib main #deb cdrom:[Debian GNU/Linux 4.0 r0 _Etch_ - Official i386 DVD Binary-1 20070407-11:40]/ etch contrib main deb http://ftp2.fr.debian.org/debian/ etch main non-free deb-src http://ftp2.fr.debian.org/debian/ etch main non-free deb http://security.debian.org/ etch/updates main contrib deb-src http://security.debian.org/ etch/updates main contrib |
#aptitude update
#aptitude install sun-java5-jre
You must accept the terms of DLJ license. To do it you have to answer:
- OK
- OK
- YES
#aptitude install sun-java5-jdk
Before installing the documentation, you need to download the file jdk-1_5_0-doc.zip from http://java.sun.com/j2se/1.5.0/download.html and transfer it to /tmp.
#aptitude install sun-java5-doc
Step 4: Installation Of The Database For Openfire
Be sure you have installed MySQL version 4.1.18 and later, or 5.x and later.
#mysqladmin –u root –p create openfire
Then from PhpMyAdmin import the file openfire_mysql.sql which is located in the directory /resources/database/ in the database created.
Note: This installation made on the server is easier.
Once you've installed the database start Openfire and launch your favorite browser to complete the installation.
#cd /opt/openfire/bin/
#./openfire start
In your browser (either on the client or from the server), launch http://192.168.2.1:9090; you will see the configuration screens below describing five (05) steps:
- Language selection
- Server settings
- Database settings
- Profile settings
- Admin account
Language Selection
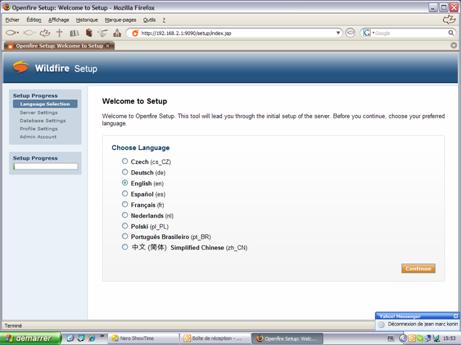
Choose your preferred language (French (fr) here), and click "Continue" to proceed to the server settings.
Server Settings
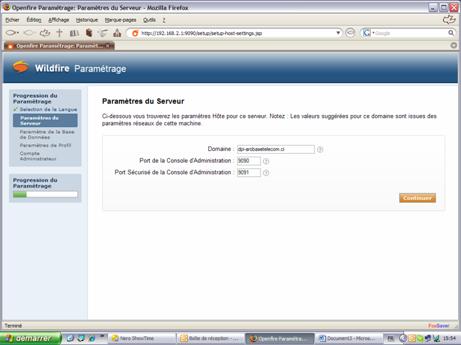
Note: In the area "Domain" the system will take by default the hostname of the server. You must change the value to your domain name - in my case "dpi-arobasetelecom.ci".
Database Settings
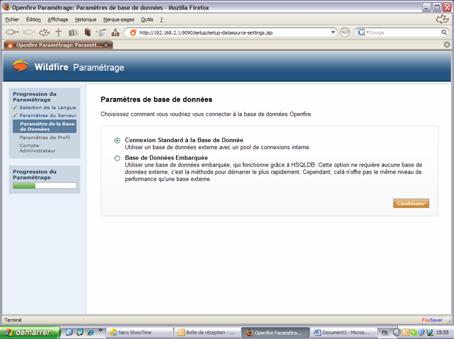
Click on "Continue".
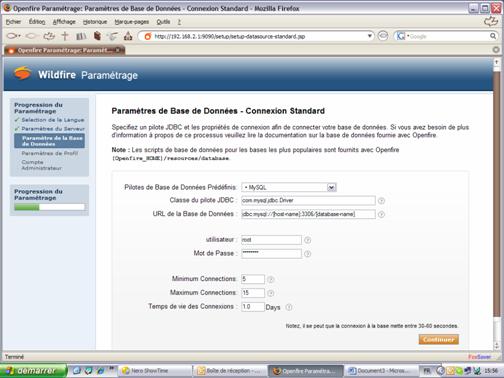
Select MySQL in "Drivers of predefined database" and change the line jdbc: mysql: / / [host]: 3306 / [database-name] to these values: host: localhost and database-name: openfire to obtain
jdbc: mysql: / / localhost: 3306/openfire.
The fields "User" and "Password" are those of the connection to MySQL database.
Profile Settings
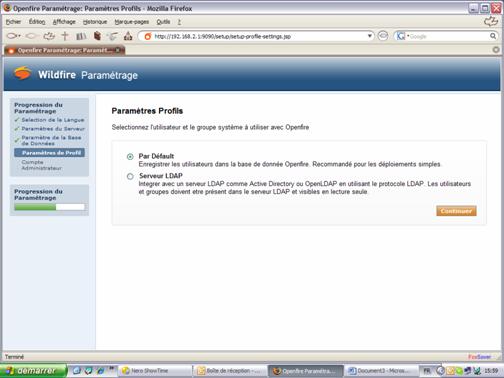
Click on "Continue".
Admin Account
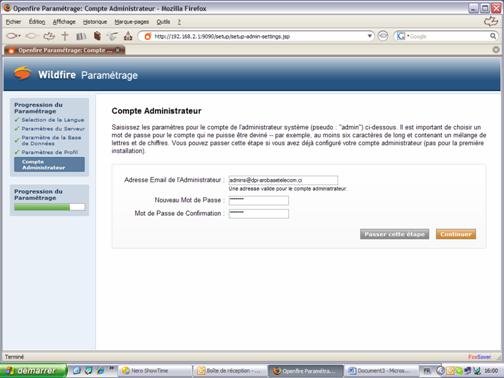
Once done if you do not have an error then everything went well. Congratulations.
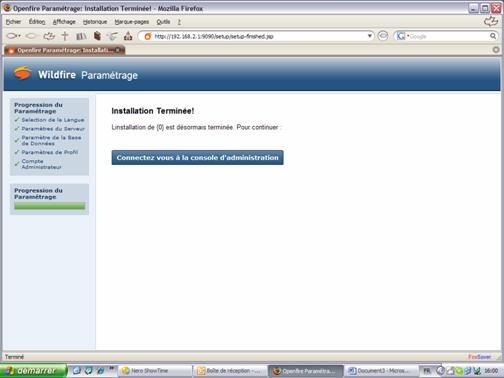
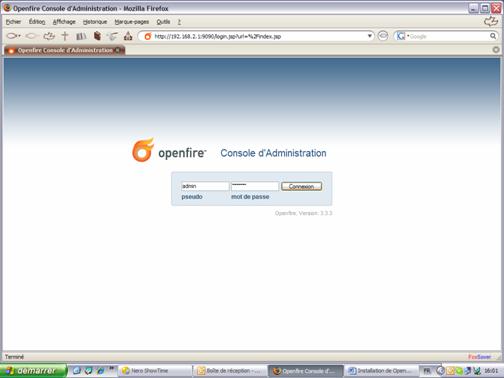
Click on "connect to administration interface", and you will be introduced to this screen:
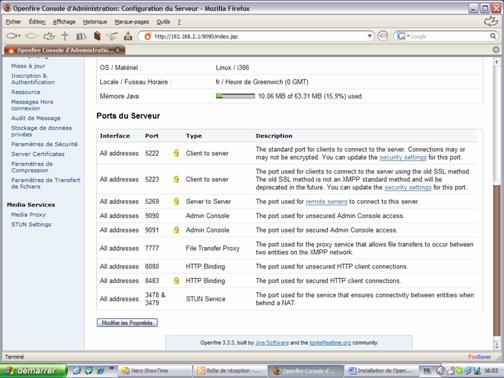
Summary Of Openfire Server Configuration
Once you are authenticated to the "administration console" you have a summary of the global configuration of the server (see below):